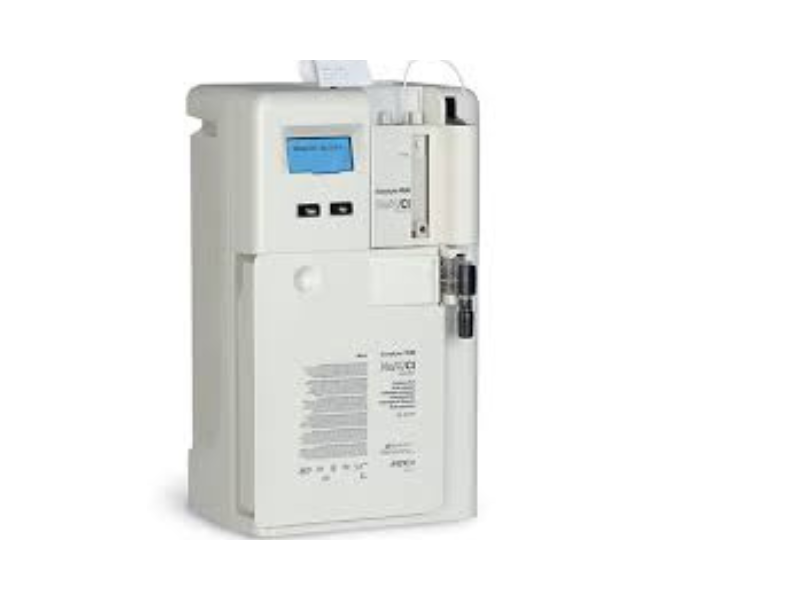
Easylyte Electrolyte Analyzer
Electrolytes are minerals and salts that conduct electricity through the production of ions when it is dissolved in water. These electrolytes help the body in functioning through a process called hemostasis. An imbalance of the electrolytes can cause diseases like heart failure, high blood pressure, kidney disorders, and many more. To know the concentration of electrolytes you need to use an electrolyte analyzer and the best one to use is the Easylyte electrolyte analyzer. Another analyzer similar to that of Easylyte is the Roche 9180 electrolyte analyzer.
This type of analyzer can measure the concentration of electrolytes like sodium, potassium, and chloride.
Specifications of Easylyte Electrolyte Analyzer
- CLIA classification is moderate complexity
- Method of operation is Ion Selective Electrode
- Whole blood, serum, plasma, and urine can be used
- 100ul of whole blood, plasma, or serum
- 1:10 400ul of diluted urine
- Produces result in 60 seconds for blood and 90 seconds for urine
- Stores 125 patients’ results
- Calibration may be automatic or in-demand
- Works best between 15-32 degrees Celsius
- Requires 220-240 volts
- Weighs about 12.79 lbs.
- Width of 9.45 inches,
- Height of 16.54 inches
- Depth of 7.87 inches
| Detection range of blood/ serum/plasma | |
| Sodium | 20-200 mmol/l |
| Potassium | 0.2-20 mmol/l |
| Chloride | 25-200 mmol/l |
| Lithium | 0.2-5.0 mmol/l |
| Detection range of urine | |
| Sodium | 25-1000 mmol/l |
| Potassium | 1.0-500 mmol/l |
| Chloride | 25-200 mmol/l |
| Lithium | Non-applicable |
A step-by-step guide to using the Easylyte electrolyte analyzer
- Be in your lab coat and gloves.
- Press the yes button to remove the device from standby.
- Press Yes to answer Calibrate Now that appears on the screen
- Analyze blood appears on the but you press no-till Second Menu appears on the screen and press yes.
- Press No-till Quality Control appears on the screen and press yes.
- Press Yes again when Run Controls appear to run Normal control.
- Press Yes to release the probe for aspiration
- Swirl the normal quality control and pour about 3-5 drops into an Eppendorf tube.
- Place the Eppendorf tube under the probe making sure it reaches the bottom of the tube and press yes to aspirate the normal quality control.
- As the probe goes back into the analyzer gently hold cotton around the probe to clean it.
- Once the results are ready, compare the results on the Easylyte electrolyte analyzer to that of the normal quality control. Once the results are in range with the manufacturer’s range, all reagents are in good working condition.
- Press Yes to leave the window and press yes again when it asks you to store results.
- Press Yes as the answer to Next Sample.
- Press No to move to High control and press yes.
- Take the Abnormal high control and follow the procedure you followed when running the normal control.
- You can also decide to run abnormal low control. Once the results are in range with what the manufacturer produced then you can start running your samples.
- If the results are not in range with the manufacturer’s guidelines you need to check the reagents or call a certified engineer to have a look at the analyzer.
- Once the control and calibration have been successfully done, analyze blood will appear on the screen, and press Yes. You can either run whole blood, serum or plasma.
- Serum or plasma is preferred because some tubes contain sodium or potassium which may interfere with the results. Spin the sample and pour an aliquot of plasma or serum into an Eppendorf tube
- Press No to answer the Patient ID number which will release the probe.
- Place the Eppendorf tube containing the serum under the probe making sure the probe touches the bottom of the tube
- Press Yes to aspirate.
- As the probe goes back into the analyzer gently hold cotton around the probe to clean it.
- Read and record your results.
- Press Yes to move to analyze blood.
- After running your tests for the day, press No to move to Daily Cleaner and press Yes.
- The probe will be released and you can place the probe cleanser under the probe.
- Press Yes to aspirate to clean the analyzer which then moves the analyzer to standby mode. Read about the principle of HB Gazelle Variant.
Principle of Operation of the Easylyte Electrolyte Analyzer
I have already stated above that the method of operation of the Easylyte electrolyte analyzer is Ion Selective Electrode, You can also read on the best electrolyte analyzers you can use in the laboratories.
It adopts a comparative approach to measurement. When a sample is pumped through an electrode array, the analyzer first calculates the potential that is created. After that, Standard A is introduced into the electrodes. The ratio of the ion concentration in the sample to the corresponding concentration in the Standard solution determines the difference between the two potentials. Since the concentration of the ions in the Standard solution and the difference in potentials are known, the analyzer may use the Nernst equation, which can be expressed as follows, to determine the concentration of the ions in the sample solution. The Nernst equation is expressed as:
- E – E°= S log (Ci (x) / Ci (s)) or Ci (x) = Ci (s) x 10^ (E-E°)/S
- where: E= ISE potential developed in sample solution
- E°= ISE potential developed in the standard solution
- S= Electrode slope calculated during calibration
- Ci(x) = Concentration of ion “i” in the sample
- Ci(s) = Concentration of ion “i” in the standard solution
During calibration, “S,” the slope, is calculated using Standards A and B, which have known ion concentrations. The EasyLyte Calcium analyzer converts the ionized calcium results to the corresponding Ca+2 value at a sample pH of 7.40 within the pH range of 7.2 to 7.6 units. Using the formula, the EasyLyte Calcium displays this calcium value normalized (to pH 7.40). The formula is expressed as: nCa= Ca+2 (pH=X) x 10 -o.24x (7.40-X)
where X is the pH to be measured
Due to the invention of selective glasses for sodium, potassium, calcium, and chloride, it has led to the development of sensors known as ion-selective electrodes to detect the concentration of the electrolytes contained in biological fluids like blood, serum, plasma, and urine directly even with the physiological changes. Another principle you can look at is the principle pf the iris ichem velocity urine analyzer.
The Easylyte uses ion-selective electrode technology to test and measure the concentrations of the pH, lithium, sodium, potassium, and chloride in biological fluids like blood, serum, plasma, and urine. The glass tubing used in the flow-through sodium and pH electrodes is particularly designed to be sensitive to sodium ions.
The plastic tube used by the flow-through potassium and calcium electrodes contains neutral carrier ionophores.
A plastic tube specifically designed to be selective to lithium or chloride ions is included in both the flow-through lithium electrode and the flow-through chloride electrode.
Each electrode’s potential is evaluated at a constant, reliable voltage created by the silver/silver chloride reference electrode. The voltage that an ion-selective electrode produces changes depending on the concentration of the ions it responds to.
This relationship is expressed as E= E0 + (RT/nF) log10 (gC)
- E = The potential of the electrode in the sample solution
- E° = The potential developed under standard conditions
- RT/nF = A temperature-dependent “constant” termed the slope(s)
- n= 1 for sodium, potassium, chloride, lithium, and pH
- n=2 for calcium
- g= The activity coefficient of the measured ion in the solution
- C= The concentration of the measured ion in the solution
The sodium electrode is cleaned when an automatic calibration is started by aspirating Wash Solution (ammonium bifluoride) as needed from the solutions pack. Aspirating and measuring Standard A first, then Standard B, with the EasyLyte. Finally, the EasyLyte aspirates and measures a further Standard A solution. Each measurement is examined for instability and the two Standard Readings are compared for drift (noise). The slope is determined by subtracting the Standard B reading from the second Standard A value. A slope that exceeds the bounds of the software will be flagged and shown as low or high. When significant drift or noise is detected, EasyLyte will display the relevant error message. Another simple electrolyte analyzer is the smartlyte electrolyte analyzer.
Conclusion
After reading how to use the easylyte electrolyte analyzer, you will bear with me that it is one of the easiest devices to operate. As an intern, you will need little or no supervision when working with this machine. The principle has also been provided to help you understand how the device work. This will make you a great scientist. You can also read about the principle of Snibe Maglumi 800 analyzer.